

Laptop Screen Extender Of course! A “Laptop Screen Extender” can refer to two main things: the hardware you use to add a monitor, or the software that helps you manage multiple screens.
Let’s break down everything you need to know.
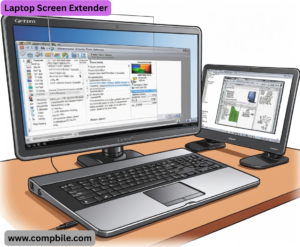
The Hardware: Physical Monitors
- This is the most common meaning. You’re adding a second (or third!) physical screen to your laptop.
How to Connect a Second Monitor:
- Step 1: Check Your Laptop’s Ports
- Look at the sides of your laptop for one of these video output ports:
- HDMI: The most common rectangular port.
- USB-C (Thunderbolt 3/4): A small, oval port. If it has a lightning bolt symbol (⚡) next to it, it’s even more powerful.
- DisplayPort (miniDP): Similar to HDMI but with a different shape, often with a locking mechanism.
- VGA: An older, blue port with many pins (analog, not recommended for new monitors).
Step 2: Choose Your Monitor
- You can use a dedicated desktop monitor, a portable monitor, or even some modern tablets as a second screen.
Step 3: Get the Right Cable or Adapter
- If your laptop and monitor have the same port (e.g., both have HDMI), just get a standard HDMI cable.
- If they have different ports (e.g., your laptop has USB-C, but the monitor has HDMI), you’ll need a USB-C to HDMI adapter or cable.
- Step 4: Connect and Configure (Windows)
- Plug everything in and power on the monitor.
- Press Windows Key + P on your keyboard.
Choose your display mode:
- PC screen only: Only use the laptop screen.
- Duplicate: Show the same thing on both screens.
- Extend: This is the goal! It turns the second monitor into extra desktop space.
- Second screen only: Only use the external monitor.
- You can then go to Settings > System > Display to arrange the monitors virtually (e.g., drag screen #2 to the left or right of screen #1) and adjust resolution.
Portable Monitors: The Ultimate “Extender”
- This is a fantastic, travel-friendly solution. Portable monitors are thin, light, often powered by the same USB-C cable that carries the video signal from your laptop.
Pros:
- Highly portable, similar in size to a laptop.
- Often powered by a single USB-C cable (simplifies setup).
- Provides a large, high-quality second screen.
Cons:
- Another device to carry and potentially charge.
The Software: Virtual Screen Management
- Sometimes, you don’t have a physical screen, but you want more space. This is where virtual desktop and screen-spacing software comes in.
Windows Virtual Desktops (Built-in)
- What it is: Creates multiple, separate desktops on a single screen.
- How to use it: Press Windows Key + Tab and click “New Desktop” at the top. You can have one desktop for work, one for social media, etc.
- Best for: Organizing tasks, not for true screen real estate extension.
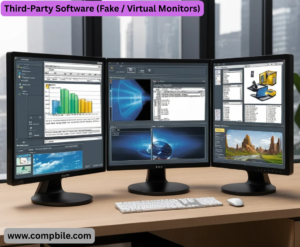
Third-Party Software (Fake / Virtual Monitors)
- These apps create a software-based second screen that can be used in various ways.
- Spacedesk: The most popular option. It allows you to use another computer, tablet, or even your phone as a second display over a network (Wi-Fi or LAN).
- Use Case: Turn your old iPad or Android tablet into a wireless second monitor for free.
- Virtual Display Driver Software: Tools like usbmmidd (from DisplayLink) or others can trick your computer into thinking a physical monitor is connected, which is useful for specific remote access or screen capture scenarios.
Advanced Setups: Beyond a Single Monitor
- Why stop at two screens? With modern laptops, you can create a true command-center experience.

The “Ultimate” Triple-Monitor Setup:
- Laptop’s Built-in Screen: Your primary communication hub (Email, Slack, Teams).
- Primary External Monitor: Your main work canvas (coding, design, main document).
- Secondary External Monitor: Your reference screen (research, documentation, music/monitoring).
How to Connect Multiple External Monitors:
- The Easy Way (Modern Laptops): Use a Docking Station. A single USB-C or Thunderbolt cable from your laptop can connect to a dock that provides power, 2-4 monitor outputs, USB ports, and Ethernet.
- The Adapter Way: Use a Multi-Port Adapter (e.g., a USB-C hub with dual HDMI outputs).
- The Mixed Port Way: Use your laptop’s built-in HDMI port for one monitor and a USB-C to HDMI adapter for the second.
Deep Dive: Portable Monitors
- This category has exploded in popularity. Here’s what to look for:
Key Features:
- Size & Weight: Typically 13-17 inches and very thin.
- Power & Video via USB-C: The holy grail. A single cable handles both (look for “USB-C with Power Delivery”).
- Touchscreen: Some models offer touch input, which can be great for designers or for using Windows’ touch gestures.
- Built-in Stand/Case: Many have a folding smart case that acts as a stand.
- Resolution: 1080p (FHD) is standard, but 2K and 4K options are available for sharper text and images.
Popular Brands:
- ASUS ZenScreen: The pioneer and a very reliable choice.
- Lenovo ThinkVision M14: A high-end option with a great build quality.
- LG UltraFine: Excellent color accuracy, often used by creatives.
- Arzopa, Lepow: Popular, more affordable brands on Amazon with good reviews.
Deep Dive: Software & Management Tools
- Once you have multiple screens, managing windows becomes the next challenge.
Built-in Windows Snap Layouts (Windows 11):
- Hover over a window’s maximize button to see layout options. Drag your window into a zone to snap it into place. Perfect for organizing two or three apps side-by-side on a single large monitor.
Powerful Third-Party Window Managers:
- These tools supercharge your workflow by letting you create custom keyboard shortcuts to resize and move windows.
- Microsoft PowerToys (Free & Open-Source): Its “FancyZones” feature is a game-changer. You create a custom grid layout for your monitors and simply drag windows into the zones. It’s highly customizable and incredibly efficient.
- Use Case: A programmer who always wants their code editor on the left 2/3 of the screen and a terminal and browser on the right 1/3.
- DisplayFusion (~$30): A powerhouse with tons of features:
Different wallpapers on each monitor.
- Title bar buttons on multi-monitor tasks.
- Advanced window-snapping scripts.
- Monitor profiling (auto-arranges windows when you dock/undock).
- Rectangle (macOS, Free): For Mac users, this is the essential window management tool, similar to FancyZones.
Niche & Creative “Extending” Solutions
Using an iPad as a Second Screen (Apple Ecosystem)
- Sidecar: A built-in feature of macOS and iPadOS. With a single click, your iPad becomes a wireless (or wired) high-quality second monitor for your MacBook. It also supports Apple Pencil input for drawing.
- Duet Display: A paid app that pioneered this concept and also offers a Windows version.
Projectors as a Giant “Screen Extender”
- A portable projector can turn any wall into a 100-inch monitor. Great for presentations, movies, or even having a massive, non-intensive screen for reference materials.
VR/AR Headsets – The Future?
- Headsets like the Meta Quest Pro or Apple Vision Pro offer the concept of “infinite virtual desktops.” You can have multiple, floating screens in your virtual space. It’s still an emerging technology but represents the ultimate form of screen extension.
Pro Tips & Common Issues
- Calibrate Your Monitors: Different screens have different color temperatures and brightness. Use your OS’s display settings or a hardware calibrator to make them match for a seamless visual experience.
- Match Scaling: If one monitor is 4K and another is 1080p, you might have to adjust the “Scale and layout” percentage in Windows so text and icons aren’t tiny on one and huge on the other.
- The “Missing Monitor” Problem: If a monitor isn’t detected, press Win + Ctrl + Shift + B to reset your graphics driver. This often wakes it up without a full reboot.
- Cable Quality Matters: A cheap, out-of-spec HDMI cable might not support the highest resolution or refresh rate of your monitor. Invest in good cables.